Steamworks Documentation
- Documentation Home Page
- Getting Started
-
Store Presence
- Applications
- Coming Soon
- Developer And Publisher Homepages
- Early Access
- Explain Your Editions
- Franchise Pages
- Free To Play Games
- Graphical Assets - Overview
- Livestreaming
- Localization and Languages
- Pre-Purchasing on Steam
- Pricing
- Promo Event Tools, Rules, and Guidelines
- Release Dates
- Release Options
- Release Process
- Removing a product from Steam
- Review Process
- Season Passes
-
Steam China
- Steam Tags
- Store Page, Building and Editing
- Testing On Steam
- Top Sellers Lists
- Trailers
- Updating Your Game - Best Practices
- User Reviews
-
Features
- Anti-cheat and Game Bans
- Common Redistributables
- Enhanced Rich Presence
- Game Notifications
- Microtransactions (In-Game Purchases)
- Multiplayer
- Stats and Achievements
- Steam Audio
- Steam Cloud
- Steam Cloud Play (Beta)
- Steam Community
- Steam DRM
- Steam Error Reporting
- Steam Families
- Steam HTML Surface
-
Steam Input
- Action Manifest Files
- Action Set Layers
- Activators
- Browsing Configurations
- General Concepts
- Getting Started for Developers
- Getting Started for Players
- In-Game Actions File
- Input Source Modes
- Input Sources
- Legacy Mode Bindings
- Mode Shifting
- Mouse Regions
- Radial Menus
- Steam Input Devices
- Steam Input Gamepad Emulation - Best Practices
- Templates for In-Game Actions Files
- Touch Menus
- Uploading Steam Input Configs to Steam Workshop
- Steam Inventory Service
- Steam Keys
- Steam Leaderboards
- Steam Overlay
- Steam Playtest
- Steam Remote Play
- Steam Screenshots
- Steam Timelines
- Steam Voice
- Steam Workshop
- User Authentication and Ownership
- Virtual Reality
- Finance
-
Sales and Marketing
- Advertising on Steam
- Best Practices, Marketing
- Community Moderation
- Curators and Curator Connect
- Discounting
- Events and Announcements Tools
- Features And Tools, Marketing
- Followers
- Google Analytics
- Points Shop Items
- Profile Features
- Steam Branding Guidelines
- Steam Community Items
- Store and Platform Traffic Reporting
- Store Widget
-
Upcoming Steam Events
- Steam Next Fest
-
Steam Themed Sale Events
- Steam Animal Fest 2025
- Steam Board Game Fest 2026
- Steam Deckbuilders Fest 2026
- Steam Detective Fest 2026
- Steam Hidden Object Fest 2026
- Steam Horse Fest 2026
- Steam House & Home Fest 2026
- Steam Medieval Fest 2026
- Steam Ocean Fest 2026
- Steam PvP Fest 2026
- Steam Sports Fest 2025
- Steam Tower Defense Fest 2026
- Steam Typing Fest 2026
- Steam Winter Sale 2025
- UTM Analytics
- Visibility on Steam
- Wishlists
- Steamworks SDK
- Web API Overview
- Accessibility Features
-
Steam Deck
- Getting your game ready for Steam Deck
- How to debug Windows games on Steam Deck
- How to load and run games on Steam Deck
- Social Media Templates
- Steam Deck and Proton
- Steam Deck Brand Guidelines and Logos
- Steam Deck Compatibility Review Process
- Steam Deck Developer Kits
- Steam Deck FAQ
- Steam Deck SVG Line Art
- Steamworks Virtual Conference: Steam Deck - Nov 12th 2021
- Steam PC Café Program
-
Steamworks API Reference
- ISteamApps Interface
- ISteamClient Interface
- ISteamController Interface (Deprecated)
- ISteamFriends Interface
- ISteamGameCoordinator Interface
- ISteamGameServer Interface
- ISteamGameServerStats Interface
- ISteamHTMLSurface Interface
- ISteamHTTP Interface
- ISteamInput Interface
- ISteamInventory Interface
- ISteamMatchmaking Interface
- ISteamMatchmakingServers Interface
- ISteamMusic Interface
- ISteamNetworking Interface
- ISteamNetworkingMessages Interface
- ISteamNetworkingSockets Interface
- ISteamNetworkingUtils Interface
- ISteamParties Interface
- ISteamRemotePlay Interface
- ISteamRemoteStorage Interface
- ISteamScreenshots Interface
- ISteamTimeline
- ISteamUGC Interface
- ISteamUser Interface
- ISteamUserStats Interface
- ISteamUtils Interface
- ISteamVideo Interface
- SteamEncryptedAppTicket
- steamnetworkingtypes.h
- steam_api.h
- steam_gameserver.h
-
Steamworks Web API Reference
- IBroadcastService Interface
- ICheatReportingService Interface
- ICloudService Interface
- IEconMarketService Interface
- IEconService Interface
- IGameInventory Interface
- IGameNotificationsService Interface
- IGameServersService Interface
- IInventoryService Interface
- ILobbyMatchmakingService Interface
- IPartnerFinancialsService Interface
- IPlayerService Interface
- IPublishedFileService Interface
- ISiteLicenseService Interface
- ISteamApps Interface
- ISteamCommunity Interface
- ISteamEconomy Interface
- ISteamGameServerStats Interface
- ISteamLeaderboards Interface
- ISteamMicroTxn Interface
- ISteamMicroTxnSandbox Interface
- ISteamNews Interface
- ISteamPublishedItemSearch Interface
- ISteamPublishedItemVoting Interface
- ISteamRemoteStorage Interface
- ISteamUserAuth Interface
- ISteamUser Interface
- ISteamUserStats Interface
- ISteamWebAPIUtil Interface
- IStoreService Interface
- IWorkshopService Interface
Uploading Steam Input Configs to Steam Workshop
For new titles we no longer recommend using the Steam Workshop for managing official game configurations. Instead recommend to use Action Manifest Files bundled with your game depots as they are easier to update for developers and manage differences within game-branches or when launching the game via the IDE for local development. This page exists to document the process for game which are already using the Steam Workshop option for configurations.
Once your game is working with the controller, you're ready to publish. You'll need to release your new game update and make your configuration the official one. Official configurations are automatically loaded when a player launches your game for the first time. This allows users to simply fire up your game and play without needing to go into the configuration screen at all.
Here's the recommended process:
Step 1 - Update your game
- Update your Steam depot with your new version of the game
Step 2 - Publish your configuration
- Run Steam in Big Picture mode and navigate to the default configuration you created in the controller configuration.
- Hit the (Y) button, or click the "Save As" button at the bottom of the screen.
- Select the desired localized title & description in the popup, change it to a PUBLIC profile, and click the PUBLISH button.
- You will get a confirmation, and the file ID of the public configuration. Copy/save the ID.
Step 3 - Make the configuration official
- Open up your game's page on the Steamworks partner website.
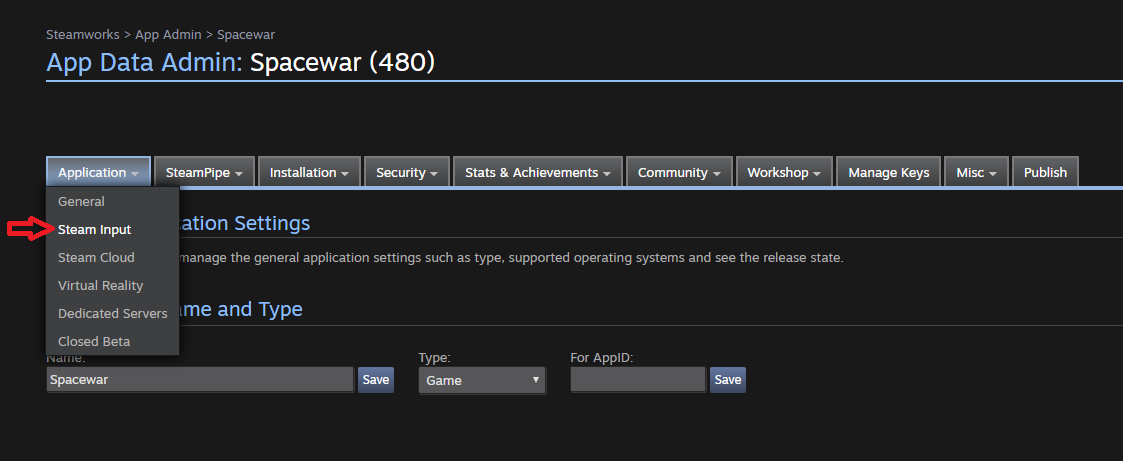
- Select "Steam Input" from the "Application" tab.

- Scroll to the section called "Steam Input Template". Select the "Custom Configuration" option in the dropdown. (If you were not planning on adding native support and just want to select from common legacy mode presets, here is where you would do so).

And from the selection below, select "Add Custom Configuration."
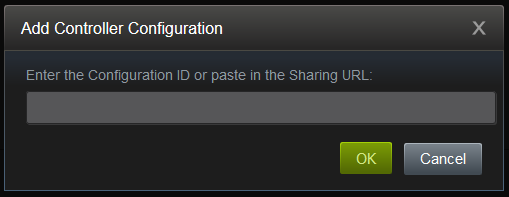
- Paste the file ID of your public configuration into the box, and click the OK button.

- Publish your app changes in the partner site as usual.
If you'd like, you can also specify multiple official configurations for your game. You may want to create an official "Southpaw" (left-handed) mode, for example.
To do this, simply create multiple configurations and publish them each via step 2. Then, in step 3, paste all the file IDs for your configurations into the box, separated by the comma character (,) characters. The first one on the list will be considered the highest priority, and will be picked by default for new players. Don't forget to make Titles & Descriptions for each of them.
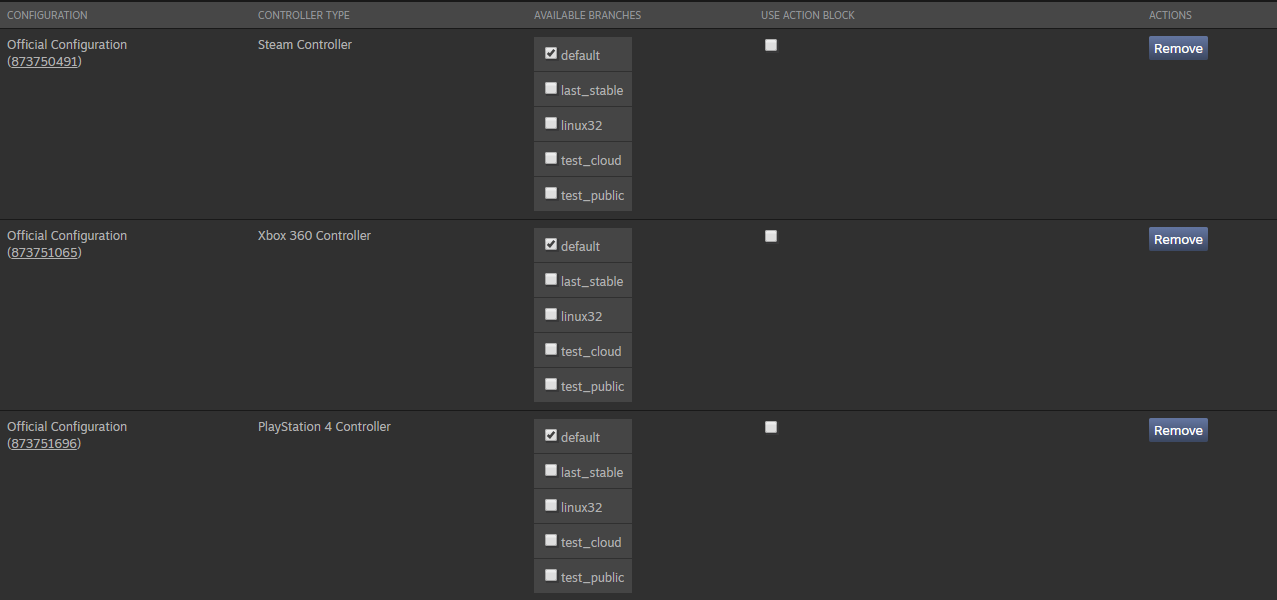
When your official configurations have been posted they will appear in the "Custom Configuration" section:

For each configuration you can get a direct link, see what controller type it is for, control which beta branches it is available on, or remove it entirely. If you create a new official configuration, you can use the remove / add functions in this section to replace an existing one.
Opting Controllers into Steam Input
Next, you should set up what kind of controllers use Steam Input - if you are using Steam Input API you'll want to make sure to check the "Any Future Devices" option to make sure new controllers work by default without you having to adjust settings after support ships in Steam.

Checking these boxes will cause those controller types to make use of Steam Input rather than their standard gamepad input protocols.
Updating your official configurations
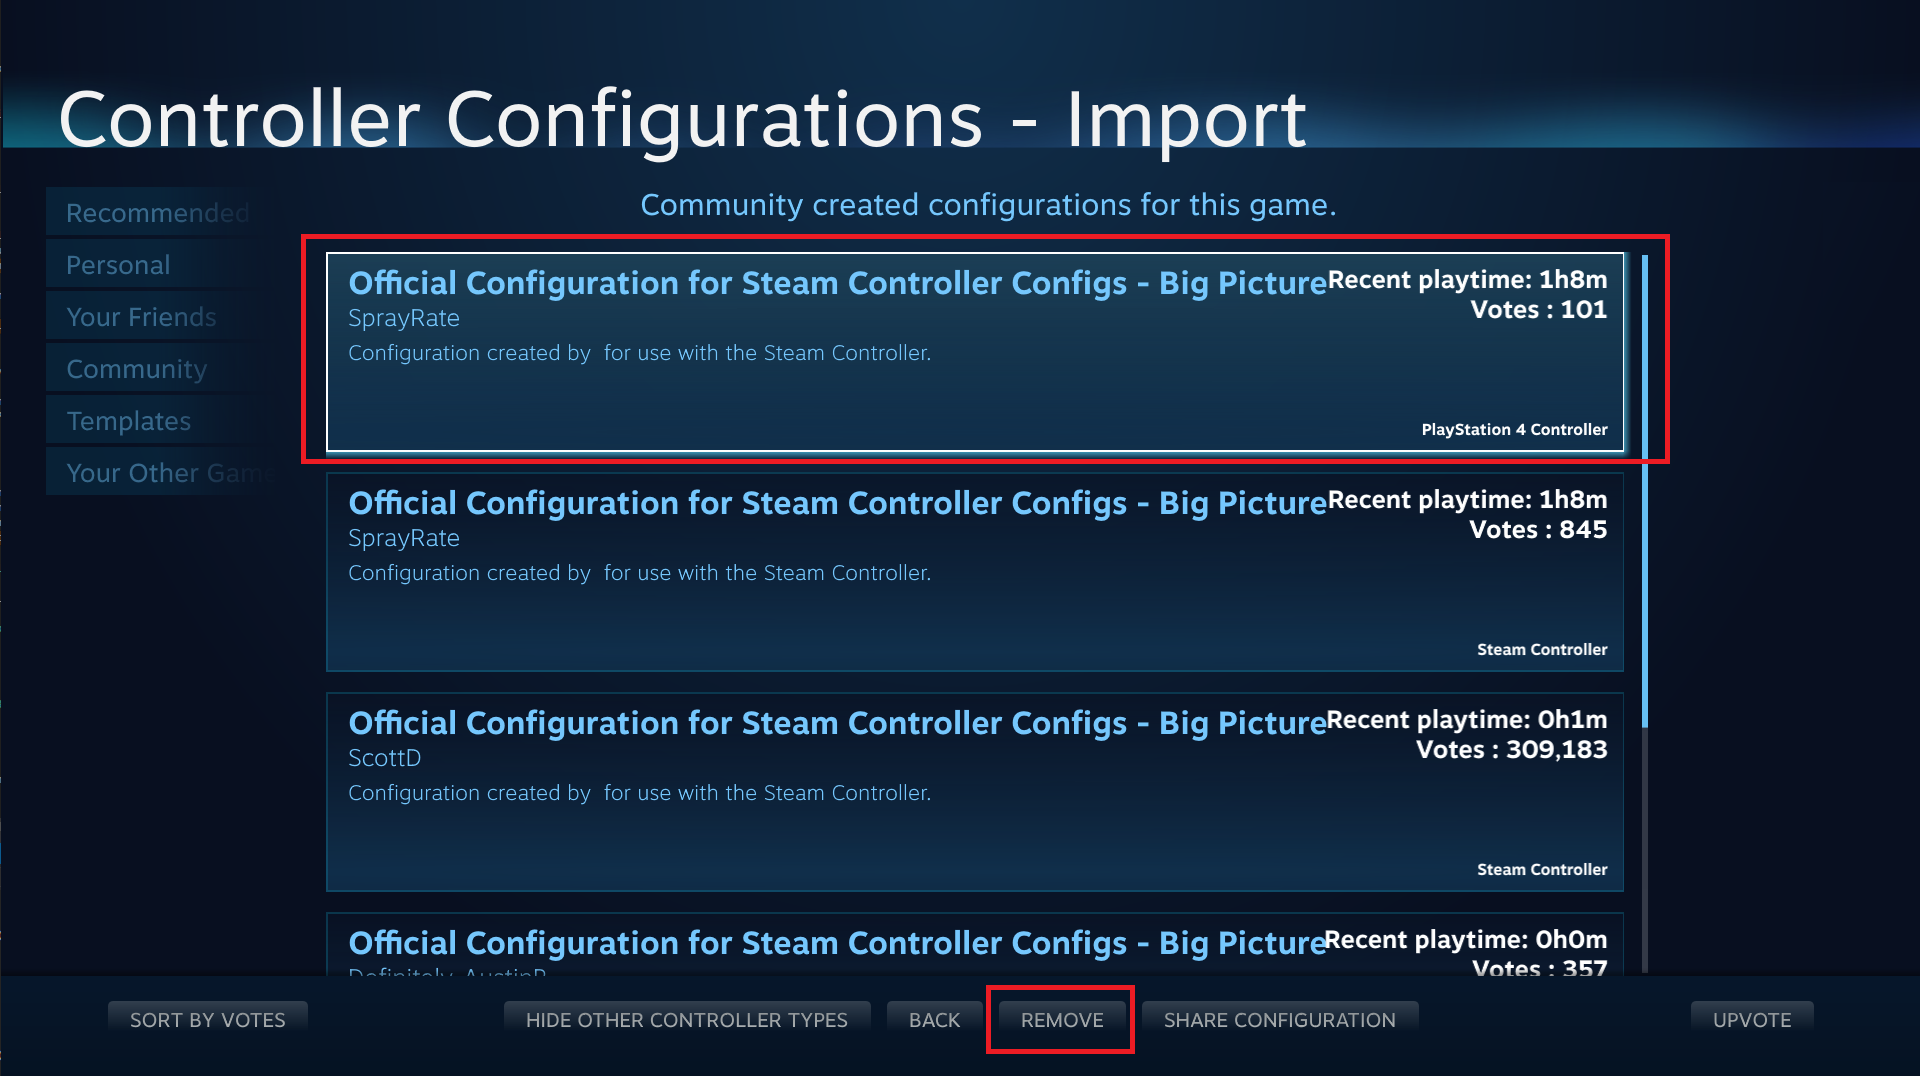
There are two ways to update your configuration.- To make a breaking change such as adding/removing a new action set or adding actions that must be bound upload a new configuration for each supported controller type and remove the old configuration. You should also go into the Steam Input Configuration browser with the account that created the configuration and mark it deleted by hitting:

- To make an optional change such as adding a new language for your action name localization or adding a new optional action that does not need to be bound in every configuration, upload a single new configuration and use the "Use Action Block" checkbox to make sure the action block of that configuration is used preferentially on the selected branches.


